
Disclaimer: This is by no means a tutorial on how to setup a production server. Use this at your own risk.
Setup Server
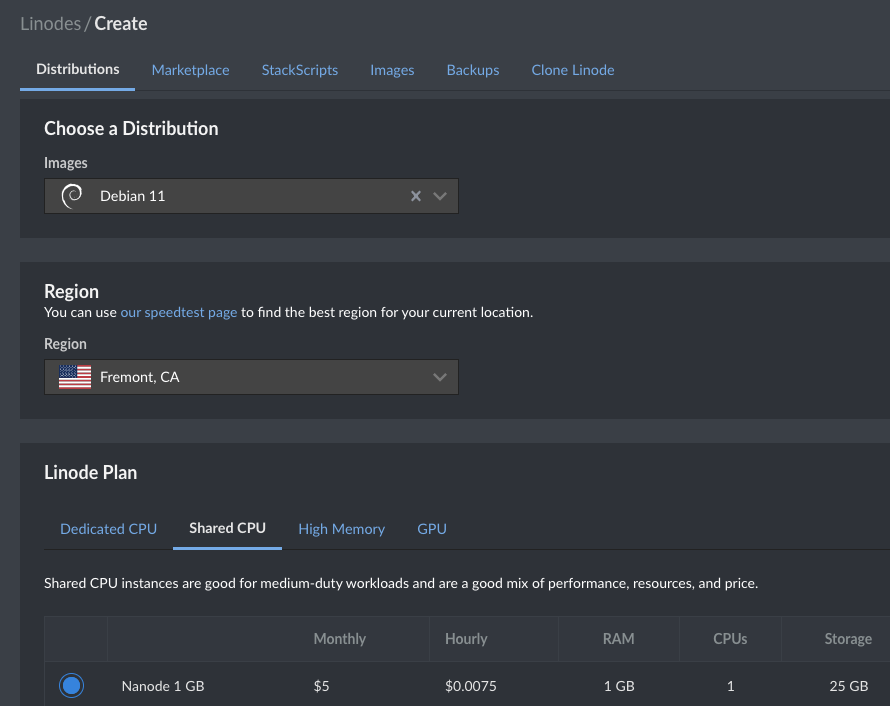
In your Linode dashboard create a new linode. I chose Debian 11 as the image for my server but you can choose whatever flavor you want.
Note: Choosing an image that uses a different package manager will result with different commands required to get things running.
I went for the smallest Shared CPU setup and that is more than enough to host most services and more.
Linode provisioning is generally very quick and will be up and running probably before you can open up your terminal to SSH into the instance. If it takes longer, just grab yourself a cup a coffee.
Setup Users
I won't get into how to set your linux box up but at the least you should create yourself a user that isn't root so that you aren't running everything as root. A newly provisioned server will likely only provide you with a root user.
useradd -m jasonk

# Change your password
passwd jasonk

# Add yourself to the list of sudoers
usermod -a -G sudo jasonk
Install Docker
I highly recommend following the docs that the Docker team put together to install Docker Engine on Debian.
Install Docker Engine on Debian
These were the steps as of 12/13/2022. Follow them at your own peril. They will only drift further from the truth the longer time passes.
# Install Pre-Requisites
sudo apt-get update
sudo apt-get install \
    ca-certificates \
    curl \
    gnupg \
    lsb-release

# Add Docker official GPG keys
sudo mkdir -p /etc/apt/keyrings
curl -fsSL https://download.docker.com/linux/debian/gpg | sudo gpg --dearmor -o /etc/apt/keyrings/docker.gpg

# Setup Repository
echo \
  "deb [arch=$(dpkg --print-architecture) signed-by=/etc/apt/keyrings/docker.gpg] https://download.docker.com/linux/debian \
  $(lsb_release -cs) stable" | sudo tee /etc/apt/sources.list.d/docker.list > /dev/null

# Update Repositories
sudo apt-get update

# Install latest version
sudo apt-get install docker-ce docker-ce-cli containerd.io docker-compose-plugin
Add your own user to the docker group so that you can run docker commands without elevated privileges.
usermod -a -G docker jasonk
Setup Database
Instead of spawning multiple postgres services per project I like to run a single postgres instance with multiple database and users.
Create the following docker-compose.yml in a directory of your choosing.
I personally put everything under /srv/<service>/
e.g. /srv/postgres/docker-compose.yml
version: '3.8'
services:
  db:
    image: postgres:latest
    restart: always
    environment:
      - POSTGRES_USER=postgres
      - POSTGRES_PASSWORD=<secret password>
    logging:
      options:
        max-size: 10m
        max-file: "3"
    ports:
      - '5432:5432'
    volumes:
      - ./data:/var/lib/postgresql/data
    networks:
      - database

networks:
  database:
    name: database
    driver: bridge
To run the database run the following command from the directory with your postgres docker-compose.yml file.
docker compose up -d
Project Setup
Make sure you have your own project ready and setup to run as a docker container. I won't cover this, but I will leave you with what my docker-compose.yml looks like for my project.
Make sure you utilize the networks key under
servicesandrootto connect to your postgres container.
version: '3.8'

services:
  jjk:
    restart: always
    build:
      context: .
      dockerfile: Dockerfile

    env_file: .env

    ports: [ '8000:8000' ]
    volumes: [ '.:/srv/app' ]

    stdin_open: true
    tty: true

    command: [ '/srv/app/bin/docker-entrypoint.sh' ]

    networks:
      - database

networks:
  database:
    name: database
    external: true
Setup NGINX
Under Debian 11 all you need to do is to run the following commands.
sudo apt update
sudo apt install nginx
After NGINX has finished installing you can add your site config in `/etc/nginx/sites-avaialable/ directory.
server {
  server_name	jjk.io;

  location / {
    proxy_set_header X-Forwarded-For $proxy_add_x_forwarded_for;
    proxy_set_header X-Forwarded-Proto https;
    proxy_set_header Host $http_host;
    proxy_redirect off;
    proxy_set_header Upgrade $http_upgrade;
    proxy_set_header Connection "upgrade";
    proxy_http_version 1.1;
    proxy_pass http://jjk;
  }
}

upstream jjk {
  server localhost:8000 fail_timeout=0;
}
Make sure you upstream points to the port that your service is hosted on in your docker setup. For my project it is exposed on port 8000.
Once you save the file you'll want to symbolic link your sites-available config file to the sites-enabled directory and restart nginx.
sudo ln -s /etc/nginx/sites-available/siteconf /etc/nginx/sites-enabled/
sudo systemctl restart nginx
LetsEncrypt for HTTPS
Follow the Certbot Install directions and run certbot --nginx which should provision and modify your NGINX config file to user their certificates.